Game Progress Route for Godfall features a recommended progression path for the main campaign of the game, it aims to provide important points of the game to avoid any missing important aspects such as relevant Locations, NPCs, Items, as well as involved boss encounters. For guides on quests, check the Quests page, if you want to check a detailed guide for each location, you may visit the Walkthrough page.
Godfall Game Progress Route
The game begins with a short tutorial mission known as The First Step. Follow the quest log and pop-up prompts to learn basic combat maneuvers, encounter low level enemies, and eventually meet the first mini-boss, High Lord Phalanxar. Defeat Phalaxar to descend into The Sunforge Temple, where you will encounter several waves of enemies as you travel inside. You will eventually reach a circular arena where you shall activate the Sunflare Orb in the middle, and defeat a continuous flow of enemies until the countdown expires. Finally, walk through the portal at the end to travel to the next level, where you will meet your second boss, Solaris. Defeat Solaris to trigger the cutscene, transitioning to the next phase.
Into the Monolith
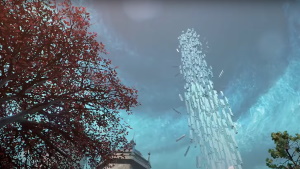
- Head to the Twilight Beacon.
- Head to the Watchtower.
- Defeat Phalanxar
- Defeat Phalanxar's warriors.
- Reach Phalanxar
- Retrieve the Rites of Ascension.
- Reach the next Twilight Beacon.
The Seventh Sanctum reveals that you must retrieve the guarded copy of the Rites of Ascension, and bring it back to her to break Macros's ritual. As you travel through the Monolith, light all Twilight Beacons and defeat enemies along the way to reach the Watchtower. Ascend up along the tower to confront and defeat High Lord Phalanxar in battle. Continue onwards as you follow the Seventh Sanctum's voice to arrive at the Phalanxar, where you will once again find High Lord Phalanxar along with his warriors, guarding the Rites of Ascension. Dispatch of them and retrieve the Rites, then proceed to the next Twilight Beacon to progress onto next part of the narrative.
The Godsmith
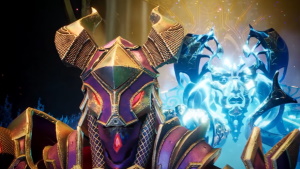
- Destroy the 3 Totems.
- Reach the Vargul Stronghold.
- Head to Prismatic Pools.
- Charge the Sealbreaker.
- Break the stronghold Seal.
- Search for your ally.
- Survive the Vargul Attack.
- Continue the search for your ally.
- Defeat Vargul Champion.
- Meet the Godsmith at the Twilight Beacon.
- Talk to Zenun Earthminder
The Seventh Sanctum has located a renowned Godsmith who can help you in your quest against Macros, however you must first rescue him from the hands of the Vargul. Travel to the Crimson Glades and explore the area, eliminating enemies along the way and destroying all 3 totems found. This should lead you into the Vargul Stronghold, through which you must look for the Godsmith as you overcome various obstacles and survive multiple waves of enemies. As you eventually travel up a staircase to reach an open area, confront and take down the Vargul Champion in battle. Continue up ahead to enter the Prismatic Falls, where you will finally meet Zenun Earthminder, the Godsmith, and complete this arc of the story.
Alluvial Plains

- Head to Alluvial Plains.
- Defeat the Vargul Defenders.
- Survive Sunflare Orb.
- Head to Alluvial Plains.
- Defeat the final Vargul leader.
- Defeat Decimus.
- Retrieve the Valorian cache.
- Head to the Twilight Beacon.
- Activate Twilight Beacon.
Zenun the Godsmith reveals that there are powerful artifacts hidden in the Alluvial Plains, to be retrieved and added as weapons to your arsenal. Begin your journey from the Crimson Glades, running through the path swiftly, and kill off enemies when necessary. Enter the Alluvial Plains after surviving the Sunflare Orb, and follow the Seventh Sanctum's voice to journey through the plains, assassinating Vargul Leaders as you encounter them. Once they are all eliminated, you find the treasure guarded by Wraith-Lord Decimus, whom you will confront and defeat in battle. Retrieve the artifacts from the nearby Valorian Cache, then light the next Twilight Beacon to proceed to the next chapter.
Ascending to Water
![]()
- Head to the Central Tower and use it to ascend to the Water Realm.
- Head to the Central Tower Bridge.
- Defeat the Tower Guard.
- Head to the Central Tower.
- Ascend the Central Tower.
- Complete the Tower's challenge.
- Defeat all enemies.
- Activate Twilight Beacon
After defeating Zamora The Far-Seeing (Boss) in the Zamora The Far-Seeing Boss Mission, Zenun requests that you further hone your combat prowess by traversing the Water Realm. Revisit the Crimson Glades once more to reach the Central Tower, where you can then ascend to the Water Realm by overcoming the tower's challenges, . As you triumph over each adversity, the tower will ascend by a level, eventually rising to the water realm's Cobalt Caldera, where you may then progress to the next stage.
The Tormentor's Asylum

- Infiltrate the Tormentor's Asylum and bring down Macros' defensive barrier around the Luminous Shelter.
- Head to the Tormentor's Asylum.
- Hunt for Aetherium sources.
- Investigate the Tormentor's Asylum.
- Defeat Thraex.
- Destroy the Spirit Tether.
- Reach the Twilight Beacon.
Despite having gained access into the Water Realm, the Silver Moon Guardian, Lunara, continues to reside there protected by a luminous shelter. The Seventh Sanctum informs you that it is an impenetrable barrier projected from a stronghold in the Tormentor's Asylum. To infiltrate it, return to Cobalt Caldera, and follow the objective log to reach the asylum as you clear foes and gather Aetherium along your path. After breaking through the asylum's seal and conducting a quick investigation, you shall encounter the mini-boss Thraex. Upon its defeat you shall discover a levitating energy source projecting power to the barrier through a spirit tether. Sever the tether by shattering the power source with a shield throw, then light the final twilight beacon before returning to the sanctum.
Leviathan's Rest
![]()
- The Abyssians are keeping a stockpile of Valorian artifacts at the Shrine of the Deep Ones in Leviathan's Rest. Let's take this opportunity to weaken our enemies and build up our arsenal.
- Head to Leviathan's Rest
- Defeat Abyssian Defenders
- Head to the Twilight Beacon.
- Activate the Twilight Beacon.
- Defeat the first Abyssian Leader.
- Defeat the next Abyssian Leader.
- Defeat the final Abyssian Leader.
- Defeat all enemies.
- Retrieve the Valorian cache.
After retrieving more realm Sigils from Water Realm hunt missions, the Seventh Sanctum will inform you of a Valorian Artifacts Stockpile kept in Leviathan's Rest Shrine of the Deep Ones. To weaken Macros's forces and further your resources, you will seize the opportunity to travel to the Leviathan's Rest via Cobalt Caldera. Mauling down Abyssian forces while looting various motherlodes on the way, follow the objective marker to arrive at the Leviathan's Rest. Soon after, the Seventh Sanctum will alert you of several approaching Abyssian Leaders along with their troops, whom you must vanquish in battle. Upon eliminating their last leader, retrieve the artifacts from the Valorian Cache at the end.
The Black Tide
![]()
- Macros has sent his personal troops to defend Lunara's cavern. Head to the Luminous Shelter and stop them.
- Locate the Lunar Gate.
- Defeat the Blacktide Ambush.
- Search for a Spirit Tether.
- Destroy the Spirit Tether.
- Search for the next Spirit Tether (2nd)
- Defeat the Blacktide Ambush.
- Destroy the second Spirit Tether.
- Search for the next Spirit Tether (3rd).
- Defeat the Blacktide Ambush.
- Destroy the third Spirit Tether.
- Return to the Lunar Gate.
- Defeat the Black Tide Enforcer.
- Reach and activate the Twilight Beacon.
Upon returning to the sanctum, Zenun and the Seventh Sanctum both commend you on taking down the various obstacles and defenses setting you back from Lunara. However, they warn you about a new wave of Black Tide forces sent out by Macros, who are using Spirit Tethers to reinforce the Luminous Shelter. To break Macros's last ditch effort in stopping conquest in the Water Realm, promptly return to Cobalt Caldera and locate the Lunar Gate. While there, seek out and sever all 3 Spirit Tethers, defeating Blacktide ambushes as you go. Travel back to the entrance and slay the Black Tide Enforcer in a final face-off, before igniting the Twilight Beacon at the end of the quest.
The Silver Moon
![]()
- Enter the Caldera Depths and defeat Lunara to gain access to the Air Realm.
- Defeat Lunara.
- Return to the Sanctum.
At last, you have thwarted all of Macros's efforts against your conquest in the Water Realm. With his barrier, artifacts, and troops defeated, you may now face the long awaited enemy that lurks under the Lumnius Shelter - the Guardian Avatar of the Silver Moon, Lunara. Enter directly into the Caldera Depths to confront Lunara, and achieve victory in battle. Return to the Sanctum to replenish your strength and reunite with your allies.
Up to the Azure Enclave

- Head to the Central Tower
- Complete the Tower's Challenge (x2)
- Head to the Twilight Beacon
You have conquered the Water Realm, but there are many more challenges ahead. Travel through Cobalt Caldera to revisit the Central Tower. Overcome its various challenges to sharpening your skills further and ascend up into the Air Realm. Once you arrive at the Azure Enclave, follow the objective marker and clear out Nyak forces to locate the next Twilight Beacon.
Shrine of the Godsmiths
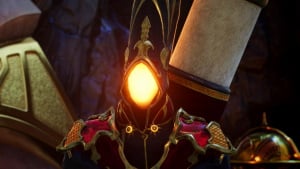
- Head to the Shrine of the Godsmiths and find the entrance to Grieves Sunsteel's forge.
- Find the Shrine
- Defeat the Nyak Champions
- Defeat the Sunflare Ravager
- Find Grieves Sunsteel
- Locate the gate
- Head to the Twilight Beacon
- Unseal the the Twilight Beacon
The next adversary is the renowned Grieves Sunsteel, feared for his superior prowess in fire magic. His lair is situatied on the opposite end of Azure Enclave, in a land below the Shrine of Godsmiths guarded by Nyak warbands. Begin your journey from the entrance of Azure Enclave, and travel towards the shrine, clearing out Nyak forces and defeating various Nyak Champions at certain points on the way. Upon arrival at the shrine, you will find that it is guarded by a vicious Sunflare Ravager. Slay it in battle to access the shrine to locate Grieves Sunsteel's base. You will discover that the entrance to his lair is in fact a set golden trapdoors diguised as lavish flooring, hidden in plain sight. Return to the sanctum after lighting the next twilight beacon to determine your next course of action.
Floating Remnant
![]()
- The Crimson Wind guard a trove of treasure deep in the part of the Air Realm known as the Floating Remnant. Head to the Air Realm and take the treasure from Macros and his guards.
- Head to the Floating Remnant
- Reach the temple
- Destroy x3 Tethers
- Reach the temple tower
- Activate the elevator
- Retrieve the Valorian Cache
- Defeat the guards
- Destroy x2 Tethers
- Defeat Excelsious
- (Bonus) Activate the Twilight Beacon
You have successfully acquired the Air Sigils needed through various hunt missions, but to overthrow Macros and his pawns, you will need stronger treasures to enhance your power. The Seventh Sanctum detected a treasure trove hidden deep within the Floating Remnant. Return to Azure Enclave, and follow the objective marker to reach the Floating Remnant. As you travel through the temple, destroy all spirit tethers to as you locate the Valorian Cache. As you approach the cache, you will encounter the temple guardian Excelsious, whom you must defeat before acquiring your treasure. Proceed onwards to light the next twilight beacon before returning to the sanctum.
First of the Godsmiths
![]()
- Must collect the required number of elemental sigils to unlock this boss mission and complete Floating Remnant (Quest).
- Defeat Grieves Sunsteel
- Return to the Sanctum
You have located Grieves Sunsteel's hidden lair, augmented your gears with newfound Air Sigils, and retrieved the enchanted treasures to empower your combat abilities. With your strengths now ascended to new heights, you are well prepared to confront Grieves Sunsteel, the commander of fire and Macros's trusted Godsmith. Head directly down into his firey dungeon, and demolish this monstrosity with the help of your reinforced battlewares and fortified valor.
Trial of the Crucible

- We have to enter the caverns around his Crucible of Souls. Head back to the Azure Enclave, fight your way to the caverns, breach those defenses, and locate the gate to the Crucible of Souls.
- Reach the Crucible of Souls
- Find the Black Tide Officer
- Defeat Black Tide Brute
- Defeat the Black Tide Officers
- Activate the Twilight Beacon
With Grieves Sunsteel eliminated, only one adversary remain between you and Macros - his devoted bodyguard, the Gilden Commander. To reach him you must breach the guarded caverns around his Crucible of Souls, against Black Tide forces and a protective Aetherium Seal. You will embark on your journey from the Azure Enclaves yet again, and vanquish waves of Black Tide troops, along with various Black Tide Officers, to eventually penetrate the cavern's defenses. As you travel deeper you shall confront the Black Tide force's last line of defense - the Black Tide Brute. Slay the beast in combat, then infiltrate the Crucible of Souls and ignite the twilight beacon at the end.
Crucible of Souls
![]()
- Defeat the Gilden Commander
You have finally broken through the Black Tide troops defenses in the caverns, and armed yourself with the optimal battle gears. It is time to face Macros's most treasured ally - the Gilden Commander. Promptly revisit the Crucible of Souls, and confront the commander in his royal chamber, and officially sever Macros from all sources of support.
The Final Ascent
![]()
- Head to the Central Tower
- Complete the Tower's Challenge
- Head to the Central Tower
- Defeat Decimus
- Defeat Falcius Diarchs
- Return to the Sanctum
- Talk to Seventh Sacntum
With the Aetherium in hand and your powers at their peak, you are ready to for the final face-off against your nemesis - your brother Macros. To reach him, you must make one last ascension through the Central Tower, passing through its various trials, including a second fight against Decimus, to reach the Monolith's Throne Room. Once there, you will be engage in a skirmish against Macros's guards, the Falcius Diarchs - cut them down in combat with your far superior abilities. Now that you have unlocked the throne room, travel back to your base to quickly regroup with Zenun and the Seventh Sanctum.
The adveraries you have coquered and trails you have endured throughout this quest has refined your potentials into unparralleled combat skills on the battlefield. You are finally ready to face Macros. Travel directly to the Monolith's Throne Room and confront your corrupted brother on the other end. Having long awaited for your fateful arrival, Macros will greet you with a series of powerful teleportation attacks, while madly claiming himself to be your god. Unleash your full power upon Macros, and put a final end to his reign of terror.
